art and design

Painting the Pinoy Rock ‘n’ Roll Daughters

Ever since I started to actively post my illustration work on social media, I’ve been getting inquiries about portraiture which is flattering because I eventually want to get into that. The thing is I’d like to #practicepamore. 😉

Who to populate my portfolio with, though? My drawing style seems suited to teen-aged girls so I knew my subjects had to fall within that demographic. Turns out I didn’t have to look too far. I knew four friends (collectively known as the Eraserheads) who have daughters — pretty ones at that. It was only fitting that I get the girls as my portrait models — I owe my career-outside-advertising to their dads, I hung out with the moms when they were still in their bellies, and I pretty much saw them grow up. One of them, Veda, was even our flower girl! The portraits were also going to be my gifts to the families. <3

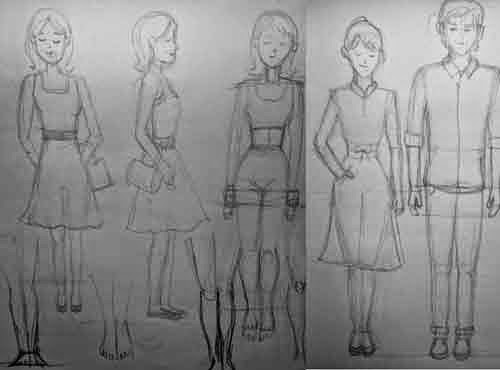
Thankfully the parents were cool with it so I coordinated with the moms and the older girls on which outfits their favorites were because I wanted their portraits to reflect their personas as closely as possible. Below on the left are my preliminary pencil sketches. After showing them to each family, I fine-tuned the drawings and transferred them on to 270 gsm cold press watercolor paper.

eraserheads daughters custom portraits

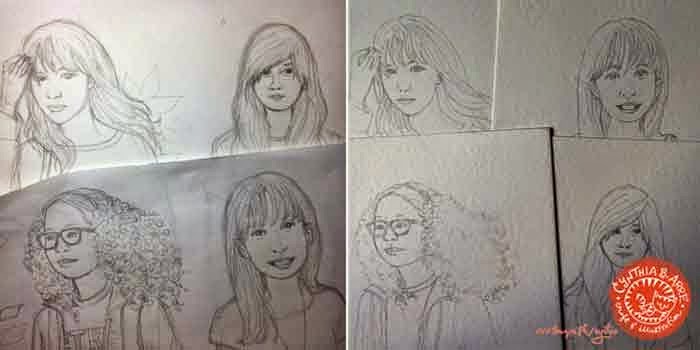
Initially I wanted to use colored pencils but it was Arnold who convinced me to use water color instead. I hesitated since I haven’t painted people realistic-style in years and that would be way out of my comfort zone. He suggested that I practice on smaller drawings first so I made these mini versions below to play with until I got my groove back. (I highly recommend this especially if you’re shifting from one medium to another.)

watercolor practice

It felt almost like playing once I got the hang of it… Okay now I think I want to do everything in watercolor. 😛

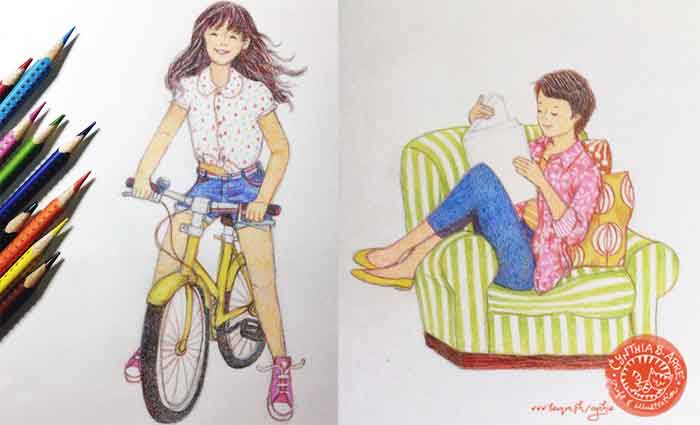
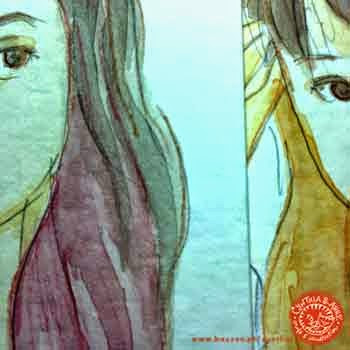
And finally here are the finished portraits. (For a closer look at the individual illustrations, please head on over to the portfolio entry.) 🙂

eraserheads daughters by cynthia bauzon arre

Share
Read More

Figure Drawing Practice

colored pencil illustrations

Figure drawing has always been my crutch so I’ve been re-learning the basics lately. Well I had a lot of practice drawing people back in art school – in fact we had an entire semester devoted to it but after years of relying on digital tools, sadly my skills deteriorated over time (see proof in my art style evolution blog post). Among my resolutions for the year was to hone whatever skills I developed in my early years and pick up where I left off.

I don’t post them online but each night for the past month I would draw human forms in different positions and let Arnold (who obviously is a whiz at figure drawing) check them for flaws. Below are some initial practice sketches from a month ago (waaah, don’t laugh 😳 ).

figure drawing practice

Now you know why I’ve always been drawing cartoon style, I was pretty bad at realistic figure drawing. Arn is a very strict teacher actually, he would give me drills and make me re-draw over and over until I would get details right. (He *should* hold workshops, don’t you think?)

It really helped me find the right path again and soon, I was able to draw those colored pencil illustrations posted above and this one below.

Kinda leaning (hah! ????) towards figure drawing these days. ?? #illustration #coloredpencils #artph

A photo posted by Cynthia Bauzon-Arre (@arncyn) on

More soon, guys. I’m also busy working on an interesting personal project which you’ll see work-in-progress pics of in my Instagram.

Share
Read More

How I make seamless patterns in Photoshop (Tutorial)

making seamless patterns in photoshop

I was in the middle of turning those vintage camera doodles on the left into a seamless digital pattern for my online stores when I thought, hey this is a good time to make another tutorial. I do know how much you (yup, all 3 of you) like reading about my design process. 😉

Step 1: Doodle, scan, clean up in Photoshop (I’m still using a Jurassic CS3 so if you’re using a newer version, you can disregard this entire blog post huhuhu). Some points to remember:

  • save your doodles in grayscale, TIFF format
  • clean it up, erase all pencil marks, close all broken lines
  • once clean, make another layer for your doodles and change the mode from grayscale to bitmap then change it back to grayscale (this will allow you to easily select and remove the white background)

Step 2: Create a new file for your pattern. I usually start with a 1500px x 1500px file. Paste your cleaned-up doodles into that file and arrange them however you like on the page.

Step 3: Add color to your drawings.

making seamless patterns in photoshop

  • make separate layers for the background, outline, and fill color(s) so you can easily make variant colorways in the future
  • once you’re happy with the colors, duplicate all the layers and place one “untouched” set in a folder and turn off the “eye” symbol to make it invisible for now
  • important: leave the background as a separate layer

Step 4: Merge the outline and fill layers of your drawing.

how to make a seamless pattern in photoshop

  • an additional precautionary step I take is to select the entire file and then go to Image > Crop in the dropdown. This way, tiny pixels that could mess up the next step will be eliminated.

Step 5: Select the merged layer and choose Filter > Other > Offset1. Type in a number that’s half of your document size in the pop-up. Since my file is 1500px x 1500px, I typed in 750 for both horizontal and vertical instances. Your drawings will scatter to the edges.

how to make a seamless pattern in photoshop

  • remember to tick “wraparound” in the popup box
  • check to see if the images in the corners will connect with one another without gaps. This is why the “Crop” command I added in Step 4 is important. Sometimes tiny, hardly visible pixels will throw the alignment off.

Step 6: Remember I told you to make a duplicate layer for the drawings? Turn on the “eye” symbol and make it visible. Take the duplicate versions of the drawings and arrange them randomly to fill up the blank spaces. This is now your “Master” file. Save it as a .PSD so you can do edits later.

how to make a seamless pattern

  • I like to flip and scale the duplicate drawings to give the pattern a (in breathy voice) casually-thrown-together look. 😉
  • see how I’ve left the background color as a separate layer? This way I can easily change it to make a variant of the pattern.

Step 7: Time to test your pattern. Select the entire page and go to Edit > Define Pattern. Type a name for your pattern in the pop-up.

Step 8: Make a new document in US Letter or A4 size (it really doesn’t matter). Create a layer, select it and go to Layer > Layer Style > Pattern Overlay. Select the pattern you just made in the Pattern palette that pops up.

making seamless patterns in photoshop

Step 9: Inspect your pattern and watch out for elements that don’t align or are too close to one another. Edit your master file accordingly and repeat steps 6-8.

making a seamless pattern in photoshop

Step 10: Once you’re happy with the pattern, save your square master file as a JPEG. You can now use that to make fabric patterns in Spoonflower or Zazzle and make some extra pocket money.

how to make a seamless pattern in photoshop

I’ve yet to upload it to my stores (since I was *ahem* busy making this tutorial) but I do hope you’ll find this post useful. 🙂

UPDATE: Now available on fabric, wrapping paper, ribbons, and other fun items on Zazzle.

  1. if you’re using a different version of Photoshop, it might be located under a different dropdown[ back]
Share
Read More

I'm Cynthia Bauzon-Arre, a Filipino watercolor artist & graphic designer. I live in QC with my graphic novelist husband Arnold and our friendly marmalade tabby Abbas. This blog has been chronicling my life, likes, and loves since 2001. [ more ]

view my portfolio

Categories

Archives