I’ve been wanting to do a home office makeover ((Whatever for did I watch all those episodes of Merge, Clean House, and Design Remix when we still had the Lifestyle channel?)) for the longest time, and it was last month’s termite invasion that pushed me to finally do it. I’ll tell you why later.
.
First, let me show you what the soho used to look like. ((Before you label me a slob though, can I just remind you that — ahem — Creative Minds Are Seldom Tidy.)):
.
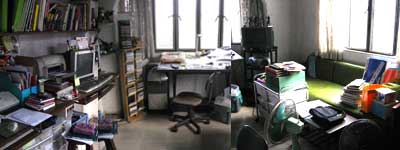
Ugh, is that a mess or what. Believe it or not, we worked in this kind of environment for close to three years. Arn later relocated to a breezier section in the house since he likes working closer to nature so this office is essentially mine now.
.
The makeover idea was sparked when I decided to lose the highly under-utilized green couch (on the right, behind all the clutter) and replace it with a table I found sitting in our compound’s common garage. I decided that I needed a spot to do my art and paper crafting, especially since I already had the supplies but just did not have the space for it. I was actually fine with that slight change for the meantime… and then we discovered that the termites had eaten into the built-in wardrobe ((This office space used to be a bedroom and the cabinet was meant to house clothing, hence the size and depth.)) that housed a lot of our files! Eep! Obviously the best only solution was to tear it down.
.
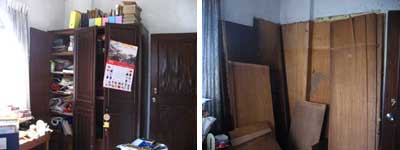
It was a beautiful piece of woodwork but unfortunately, it’s just not meant to house “office” files.
.
Obviously the next problem was where to put all the stuff that was in the cabinet. (And what a whole load of stuff that was!)
.
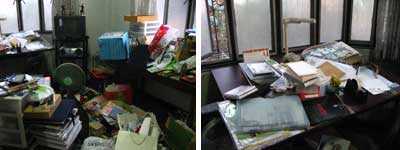
Dear oh dear. Just looking at that photo makes my head hurt.
.
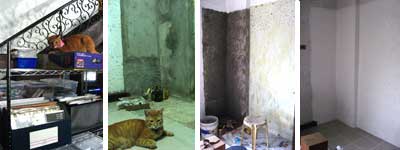
Three major criteria we considered in buying new storage supplies were (a) termite deterrence; (b) sturdiness; and (b) pocket-friendliness. The industrial shelving and plastic containers we bought all met what we were looking for, and it really helped much that the SM in our area had a 3-day sale last weekend.
.
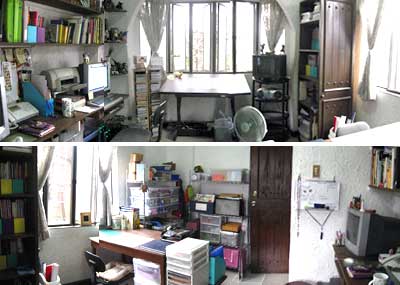
The office taking shape slowly but surely. Yes that’s a Print Gocco PG-5 Abbas is sitting on! Bought it for 6,825 yen at a Tokyu Hands in Shibuya a couple of years ago. See I couldn’t even use it before because I didn’t have a proper work surface.
.
Suddenly there was so much space and I excitedly put everything in order once the paint dried up. It took about a week and a half for everything: construction, cleanup, and sorting/deciding what went in and out of those boxes and shelves because there were just too many things to go through.
.

Looking good, looking good… now, everything’s within reach unlike before when they were stuck in the depths of that gigantic cabinet.
.
And oh, I also found a way to save the handsome narra cabinet doors – we saved what we could of the wood and then had them built into a book case for all my magazines and reference materials.
.
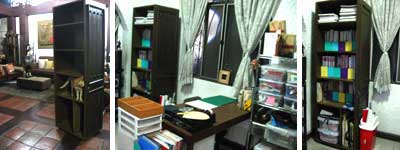
This way, those slabs of wood can still live in their “home”. 🙂
.
Here, now, are the token “after” shots of my improved soho. I can definitely see myself working more efficiently in this space… well, granted that it stays neat and orderly. 😉
.
Now to buckle down and work, work, work.
.
Cost breakdown:
– Carpentry work: P400/day for 7 days= P2800
– Zen floor tiles (10 pcs) = P465.12
– Paint, primer, paint remover, cement= P545
– Varnish (for bookcase and table)= P190
– Industrial shelving: P2,200 x 2 = P4,400
– Plastic containers (on sale) = P3,000
TOTAL: 11,400.12. ((I would’ve wanted to stay below the P10,000 mark but we wanted to invest in sturdy shelving and storage and I think that decision will save us more money in the long run.))