Posts by arncyn


In a previous post I mentioned that I’ve been self-studying Nihongo for the past four years. No reason in particular, I just wanted to exercise a part my brain that’s been dormant since, er, graduating from school? And I thought learning the language would be perfect since I grew up loving Japanese culture anyway.
I didn’t want to stress over it though so I’ve been trying out a “semi-passive” approach. The only “active” part was purposely memorizing the alphabets — hiragana, katakana, and levels 4 and 3 of kanji, some important nouns, verbs, participles… and that was it. The rest I am learning through immersion. Since 2010 my senses have been surrounded by TV shows, movies and music, all in Japanese. It’s working… I think.
Regardless of whether my method is effective or not, I was able to discover some wonderful J-pop music and artists and today I’ll be talking about them. Esquire Philippines actually invited me to share what I’m listening to in this month’s issue…
but because magazines can’t play music, I’m listing them down along with videos so you can listen to the songs too. 🙂
Moumoon – “No Night Land”
Moumoon is a Japanese indie music duo and they play the cutest synth pop which I would describe as “bubblegum with an edge”. I love all their albums so far but judging from the number of ratings stars in my iTunes, “No Night Land” contains the most tracks that I like. If I were to pick one song for you to listen to first, it would be “Bon Appetit.” (( This is my current ringtone! ))
Suemitsu & the Suemith – “Man Here Plays Mean Piano”
I think of Suemitsu-san as Japan’s Ben Folds. I would describe his music as melodic piano/synth-backed power pop and like the title says, he really does play mean piano. All his albums are worth listening to but this one has “Basketball Game Crush” which is mine (and Arnold’s) absolute fave.
Edit: Ok, I can’t find a video of BGC huhu so please listen to “Allegro Cantabile (( from “Nodame Cantabile” — I love both the TV show and the anime! )),” another of my favorites, instead.
Sakamoto Shintaro – “”Matomo Ga Wakaranai”
The title track, “Matomo Ga Wakaranai (“I Don’t Know What is Normal”) was in the soundtrack of one of my favorite Japanese dramas last year called “Mahoro Ekimae Bangaichi” (starring Eita and Matsuda Ryuhei) and after hearing it the first time, I just had to get the whole album. It’s got a laid-back funky vibe that makes me think of summer afternoons spent mindlessly browsing through secondhand records in Cubao X (or some such place). The rest of the album has a similar lazy, melancholic mood.
Shiina Ringo — “Ariamaru Tomi”
I love Shiina Ringo, her distinct voice, and her music’s unpredictable (but always beautiful) melodies. I don’t know what album this song, “Ariamaru Tomi: is from but I first heard it in the J-drama “Smile” (which, incidentally is about a half-Filipino — played by MatsuJun — trying to survive in the midst of prejudice in Japan).
Arashi — The Digitalian
Okay, confession. I listen to Johnny’s Entertainment idols too. Before you dismiss these boybands as merely eye candy, trust me when I say that there are some quality music to be found from the 30-year-old (and older) guy groups like Kanjani8, Tokio, Smap, and Arashi. On our recent Japan trip I happened upon Arashi’s latest album so I gave it a listen and loved this song immediately — “Wonderful.”
?More next time!
Do you listen to J-pop too? What or who are your favorites?

When I posted some of my eraser stamps on Instagram, some crafty friends were surprised to learn that the X-Acto Knife is all I’ve been using for carving (( Our discussiions are here and here )). It seems that most rubber stamp crafters — and I’ve noticed this on a lot of web tutorials I’ve read and watched — prefer to use lino cutters, more specifically, the Speedball Linoleum Cutter set
which I want myself. That set contains a thin, V-shaped blade that looks especially useful for gouging out narrow “canals” between outlines — a pain to attempt with the straight-edged X-acto blade.
X-Acto Knife vs. a V-Gouge
See what I mean? (via Lime Green News)
As mentioned previously, I’ve already ordered the set but while waiting I had to train myself to carve using the humble, easily available, and familiar (( oh X-Acto, how many frisket films did I cut with you back in college? )) pointy blade. Drama aside, if you want to start carving and like me, a craft knife is all you have, I will now share the process with you. I’ll even start from the very beginning — a very good place to start. *cue Julie Andrews*
** I’m by no means an expert at this. I just want to share what works for me so far. 🙂
Materials:
– a 2B lead pencil
– tracing paper
– a rubber eraser
– an X-Acto knife
– an ink pad
– blu tack (optional)
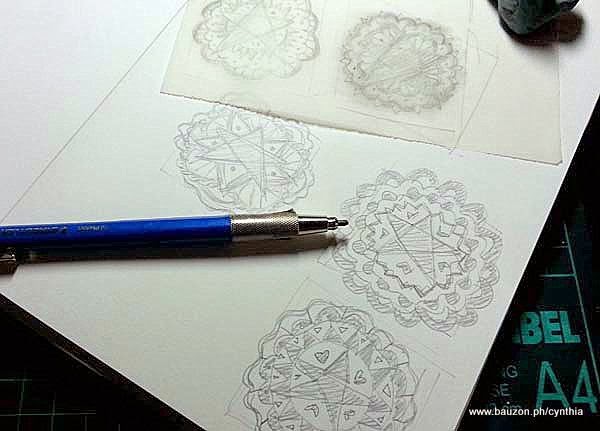
1. Plan out the image you want to carve. Shade-in the areas to keep solid to guide you when you carve later. These doodles are “parols” or Filipino Christmas lanterns and I plan to use these on homemade gift tags.
2. Trace your “master” illustration onto tracing paper with a 2B lead pencil.
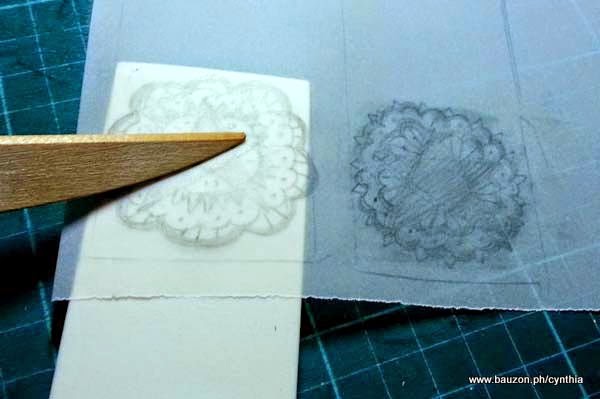
3. Place the tracing paper on top of your eraser or carving block, penciled side down. Rub on it with something firm like a pen’s bottom or a bone folder to transfer a mirror image of your sketch.
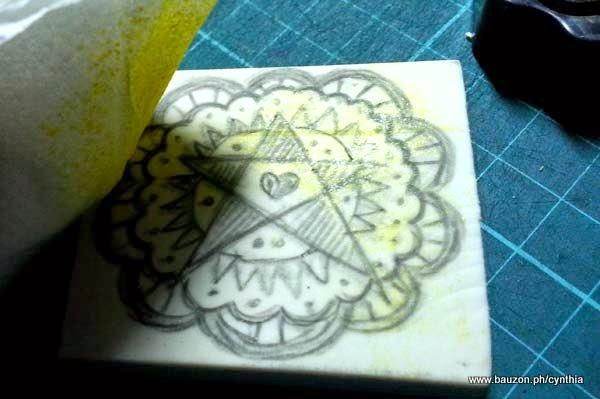
4. Totally optional but if I’m not using a two-tone carving block, I like tinting my surface lightly with some color. This is so I can easily see which areas have already been carved. Just dab a piece of tissue paper into your ink pad then pat it onto your eraser / carving block, just gently enough to tint it with color.
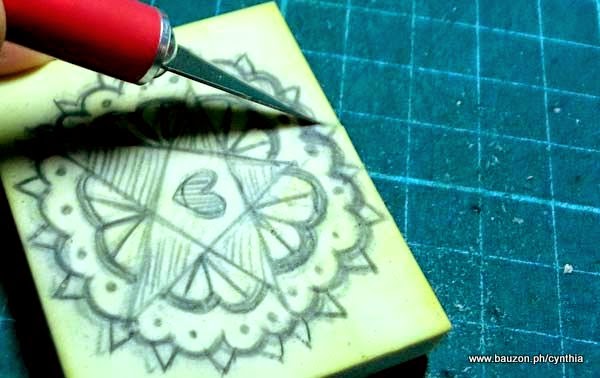
5. Start outlining your image with the X-Acto blade at a 30-45 degree angle << — very important. Remember to slice lightly because if you insert the knife too deep, it will be difficult to maneuver the blade which will result in tugging and therefore risking (a) ruining your stamp, and (b) piercing the finger you’re holding the stamp with. (Unfortunately for me I encountered all of the above on a couple of my initial carving attempts).
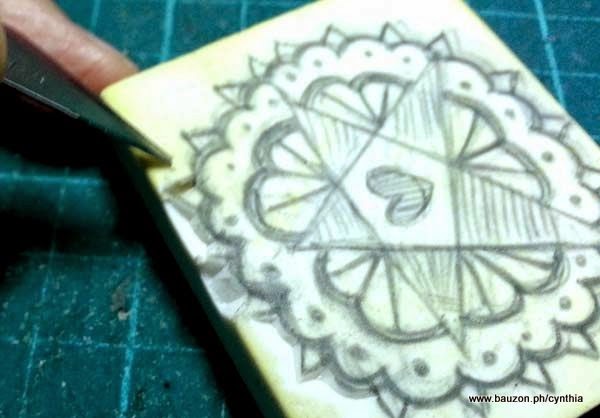
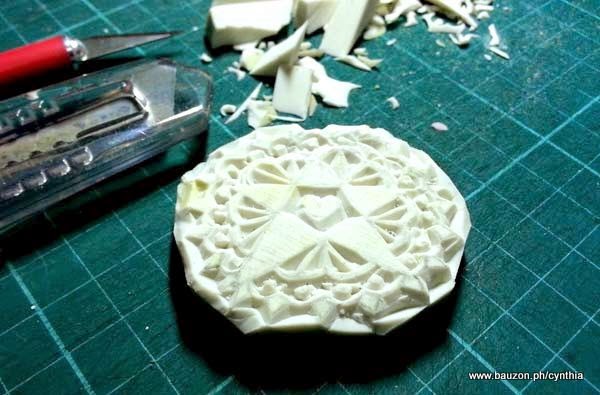
6. After you’ve outlined an area, lift the blade and turn the eraser around. Again with the blade inserted on a 30-45 degree angle, carve a curved line a short distance away from the outline you made towards the opposite direction from where you made the cut earlier. Try to “meet” the already-sliced areas with your blade’s tip, you’ll see that areas will begin peeling off. This is my favorite part. 🙂 (Gosh I hope that made sense. Please see photo above for reference.)
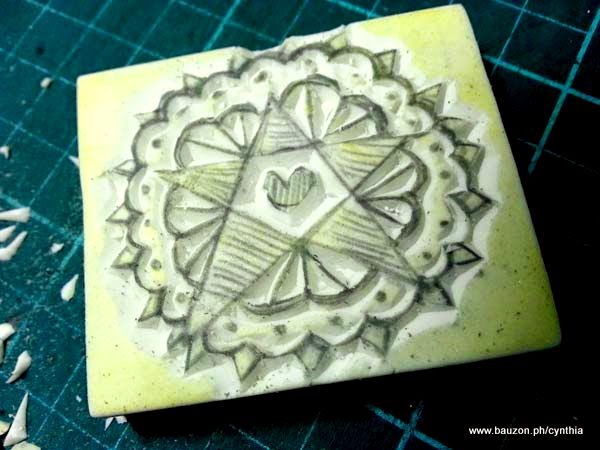
7. Soon your stamp will look like this. See how all my cuts are angled?
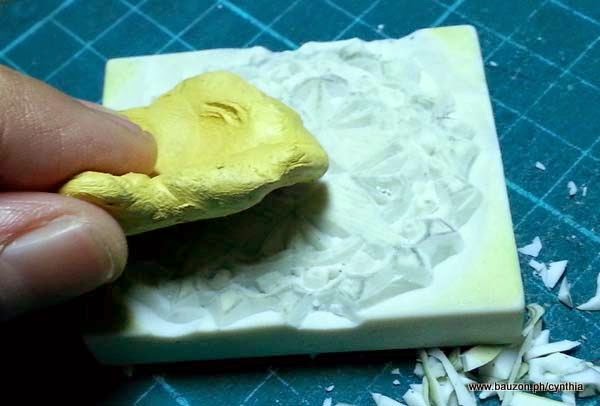
8. Completely optional again but if you have some Blu Tack (mine’s about 15-years old and it still works and lol it’s not blue) lying around, you can use that to remove pencil marks as well as stubborn little bits of eraser stuck inside crevices.
9. Trim your stamp using a box cutter. Trimming it to size will help in stamp positioning later on.
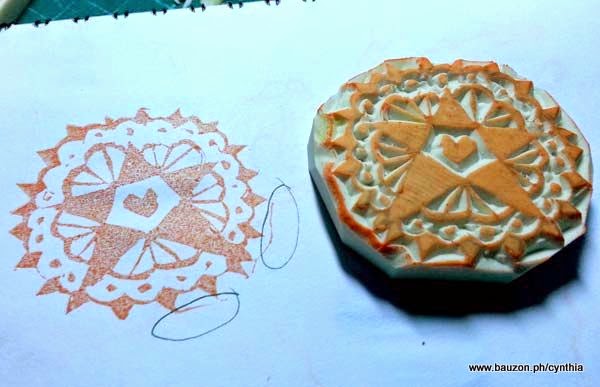
10. Make a test print. This will allow you to see which areas still need fixing. It doesn’t really need to be perfect though — part of a rubber stamp’s charm is its rough handmade quality. (Such a good excuse, ‘no? 🙂 )
11. And here are the finished stamps. 🙂
If my instructions — especially in #6 — weren’t clear to you, watch this demo by the amazing Tsukui Tomoko. She uses both a box cutter (!) and a V-gouge in the video but the box cutter method at the beginning of the video is what I’ve been doing with the X-Acto knife.
Did this help you somehow? If you have other carving tips or techniques, I’d love to hear all about them!

|

|

|

|

|


All works by Cynthia Bauzon-Arre are licensed under a Creative Commons Attribution-NonCommercial-NoDerivatives 4.0 International License. * Made in the Philippines *